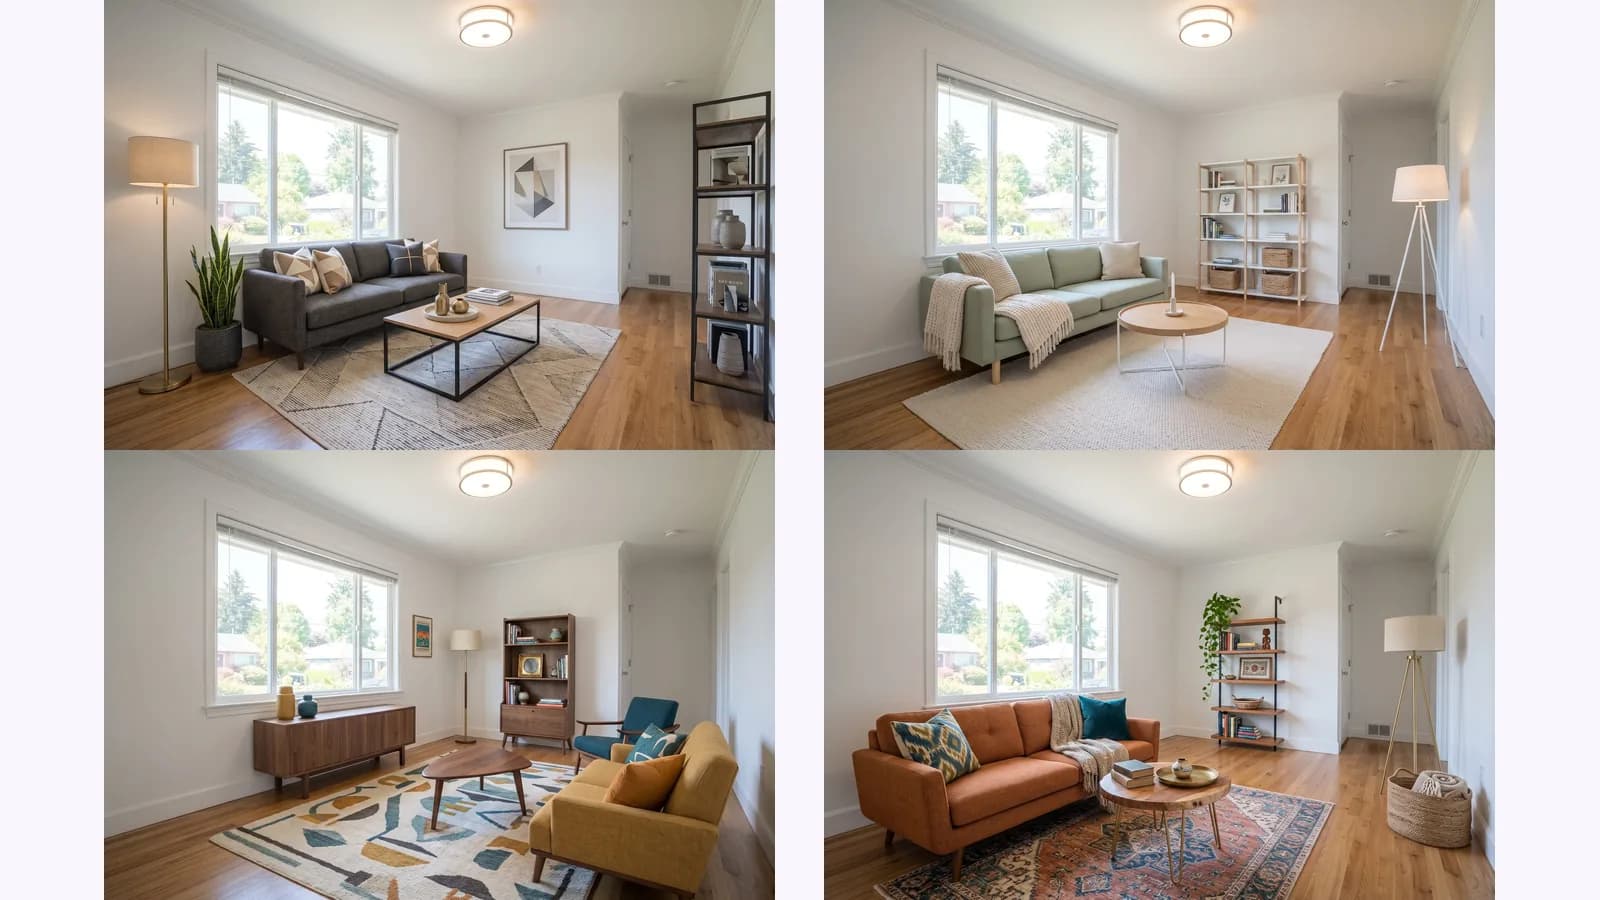
Virtual staging an empty room: 4 styles, same camera
How to virtually stage an empty room: shoot one level corner photo, stage it, then check every change against the original. One room shown in 4 styles.
Virtual staging before and after: what a good pair shows (same camera, same walls, windows and floor), two real pairs, a five-step check and what to label.
A virtual staging before and after is only worth showing if the room did not change: same camera, same walls, windows, doors and floor, with furniture the only new thing. This post shows two real pairs, one where the camera held and one where it moved, then a five-step check for any after photo and what to label. It is written for agents, photographers and stagers who use virtual staging for empty rooms.
Key takeaways
Two photos of the same room from the same camera position, where only furniture and decor differ. Walls, windows, doors, floor, ceiling and built-ins must match. Furniture should be to scale and lit from the window's side, and the after should be labelled as staged, with the original available.
Two vendors that sell staging publish checklists that point the same way. PhotoUp's guide (published 2026-08-21) lists proportioned furniture, shadows that match the window's light, matching perspective and a style that fits the home, and warns against staging that covers real selling points such as a bay window. Shhots AI's guide (published 2026-08-17, updated 2026-09-03) adds a structure test: walls, windows, doors, floors, ceilings and built-ins must match the original, and any change to them is alteration, not staging. Both are vendors, checked 2026-10-25. Their galleries cover more kinds of edit than ours. This post covers one question: did the room change?
| Must stay identical | May change | How to see a break | |
|---|---|---|---|
| Camera | Position, height, tilt, lens | Nothing | Flip the two photos: a window or door jumps |
| Structure | Walls, windows, doors, ceiling, floor, trim, built-ins | Nothing | Ring three fixed things and compare their place |
| Furniture | Nothing | Everything | Compare its size with a door, a radiator, a window sill |
| Light | Direction of the window light | Shadows the new furniture casts | Shadows fall away from the window |
| Surfaces | Floor material, wall colour | Nothing | Floorboards or paint look different |
| Label | The original stays available | A staged label on or beside the after | A conspicuous "staged" note, and a link to the original |
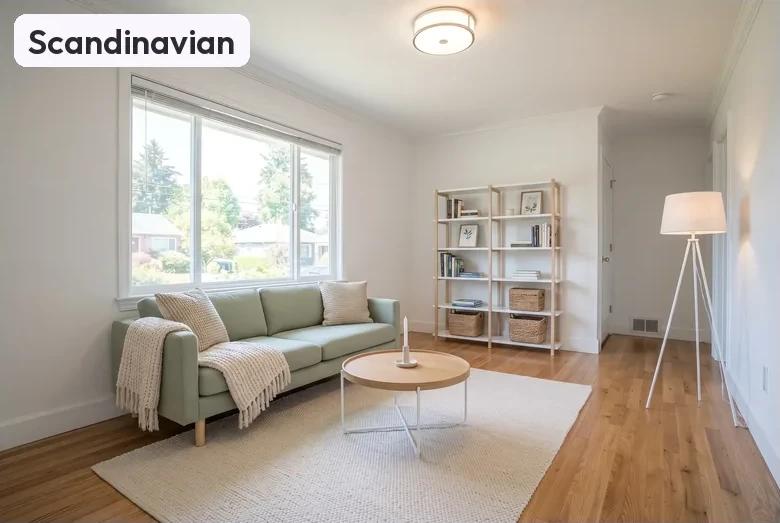
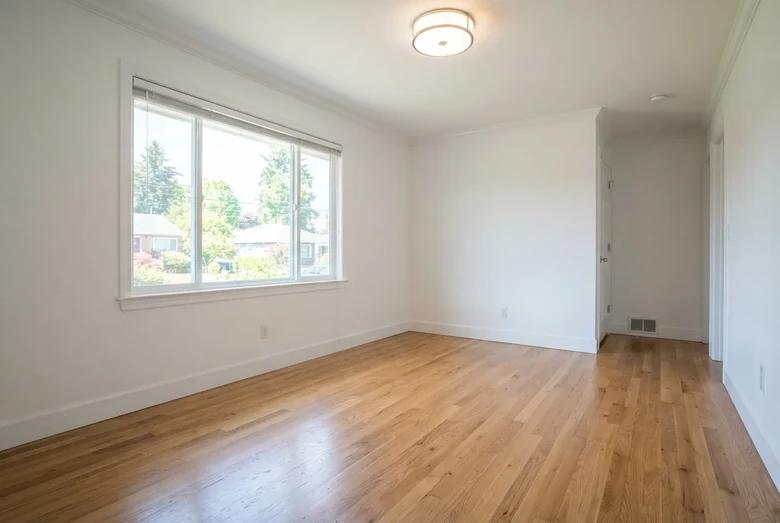
The same room, the same framing, new furniture. In our living-room pair the window, ceiling light, door and floor vent sit in the same place in both photos, and only the sofa, rug, shelf, table and lamp are new. Drag the slider: the room holds still while the furniture appears.
 OriginalStaged
The three fixtures we ringed stayed where they were. The wall outlet on the left wall is behind the sofa, so a buyer cannot see it in the after. That is furniture hiding a fixture, which the check below covers.
One where the room moved. In our bedroom pair the staged image is a different view: the foreground door leaf is gone, the window is smaller and further right, and the ceiling light is fully in frame. It is a good-looking photo of a room the buyer will not find. Slide it and watch the walls.
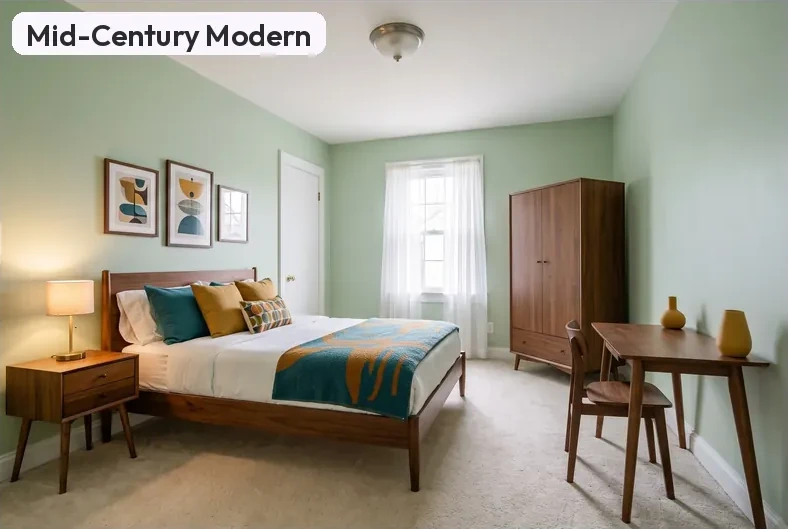
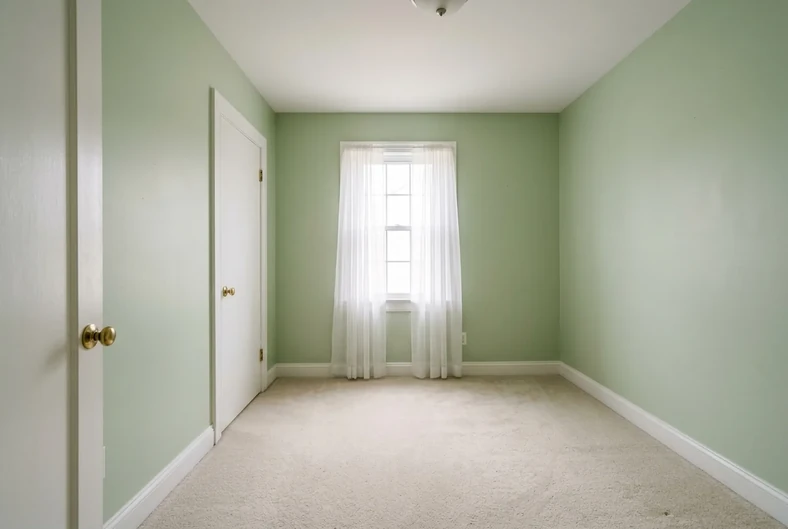 OriginalStaged
This is not a one-off, and it is not always the tool's fault. In the three-room test in virtual staging styles compared, the framing changed in 4 of 12 staged images. In how to virtually stage an empty room, a tilted photo with the floor cut off gave four results with a level camera and floor the photo never showed.
Flip between the two photos at the same size and ring three things that cannot move: a window, a ceiling light and a door, vent or radiator. They should land on the same spot in both. Then check what the furniture hides, and whether it is the right size for the room.
Eyeballing is enough to catch a moved window. To be exact, stack the two in an editor and set the top layer to Difference: whatever is not furniture should come out close to black. We did not run that test for this post.
Label the after as virtually staged where buyers see it, keep the unaltered before available, and check your MLS. California's AB 723, in force since January 1, 2026, asks for a statement "reasonably conspicuous and located on or adjacent to the image" and a link to the original. This is general information, not legal advice.
The rule text is on leginfo.legislature.ca.gov (checked 2026-10-04, as quoted in our disclosure post, which also covers CRMLS, Stellar MLS and Wisconsin). A label does not make a moved wall acceptable: it covers furniture, not changed fixtures. MultiAngle's download includes a labelled copy, a clean copy, and your original with disclosure text, so each case has a file.
A pair that passes this check can still mislead, and a pair that fails it is not always obvious at a glance. The check is by eye, our two examples are single runs, and neither room is a real listing photo. Read the limits before you trust the method.
Photograph the empty room from a corner with the camera level, upload it to Virtual staging, and download the set. One run costs 4 credits and returns all 4 styles from the camera position of your photo, plus your original and the disclosure copies. The Free plan gives 4 credits, on the 1st of each month (UTC); plans and prices cover more runs.
Then run the five checks on every style you consider, not only the one you like. The interior and real-estate guide covers the other room tools.
Stage a room and compare it with the original
Photograph the empty room from a corner, level, with the floor in frame. Stage it, then put the original and the staged image side by side at the same size. Keep the original: some rules require it to be available.
Yes, for a fair pair. Same position, height and tilt, so a buyer sees the same room with furniture. Camera, walls, windows, doors and floor should match; only furniture and decor may differ.
In California, a broker or salesperson advertising a sale with an altered image needs a statement and a link to the original (checked 2026-10-04). Many MLSs ask for the original or a label too. Check your MLS and broker before you publish.
It can. Any AI staging tool may alter a floor, a window or a light fitting. That is why the check rings fixed things: a changed fixture shows buyers a room that does not exist.
More on this topic: Virtual staging for empty rooms and Virtual Staging Guides for Empty Rooms.
How to virtually stage an empty room: shoot one level corner photo, stage it, then check every change against the original. One room shown in 4 styles.
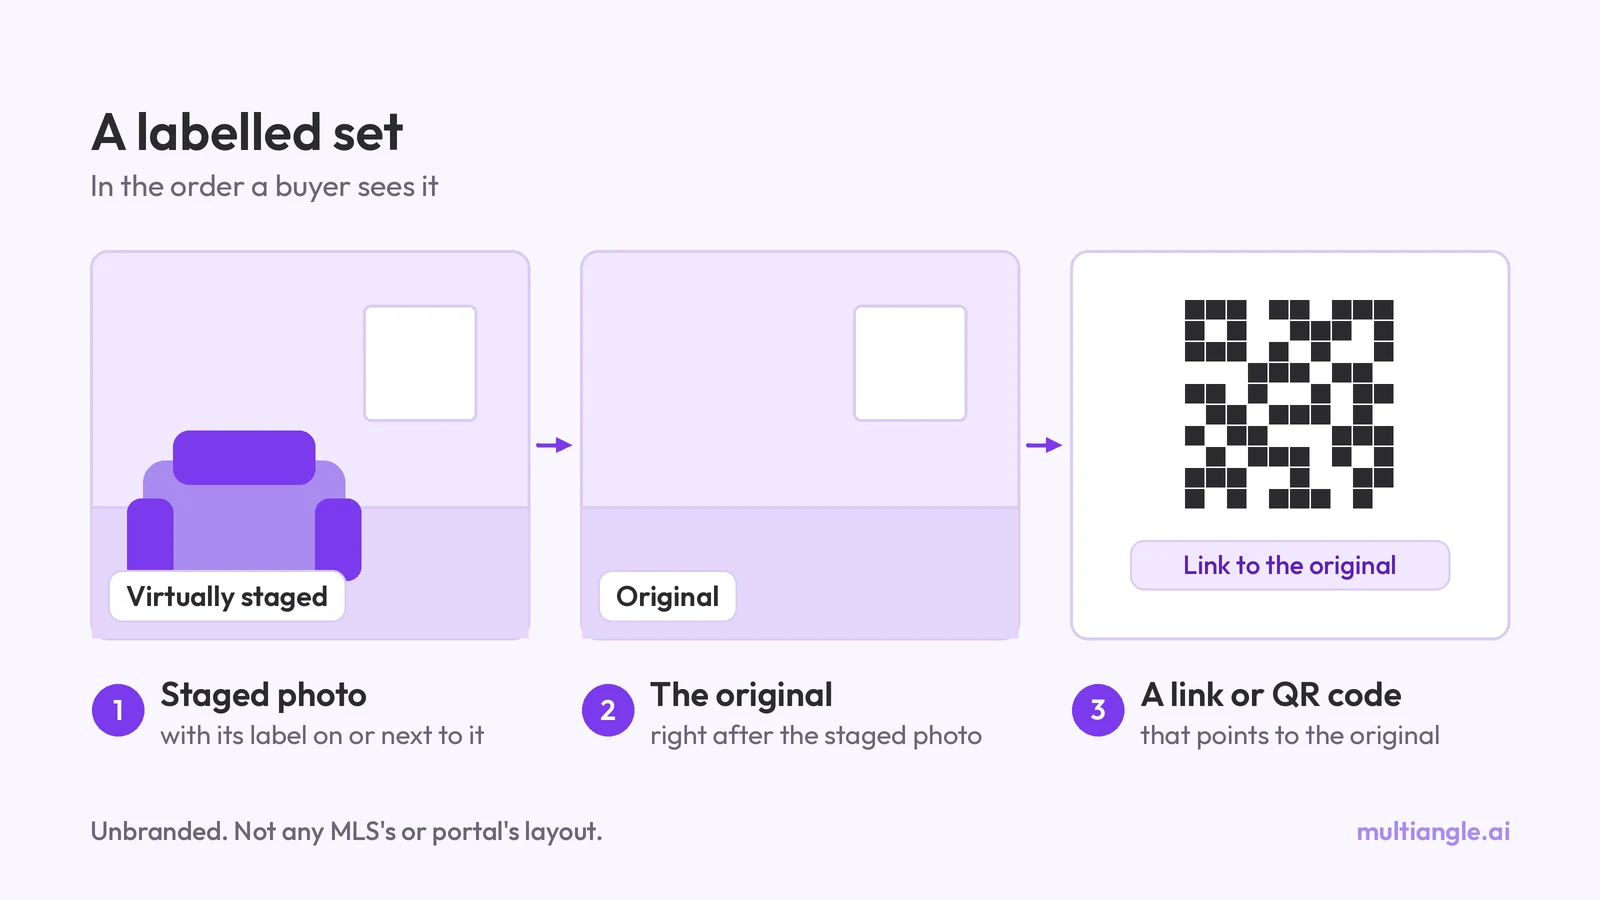
Do you have to disclose virtual staging? What California AB 723, CRMLS, Stellar MLS, NAR and Wisconsin say, quoted and dated. General info, not legal advice.
How many photos should a real estate listing have? What vendors, an agent survey and MLS rules say, plus a room-by-room shot list and the angles to cover.