AI product photography cost vs a studio shoot, 2026
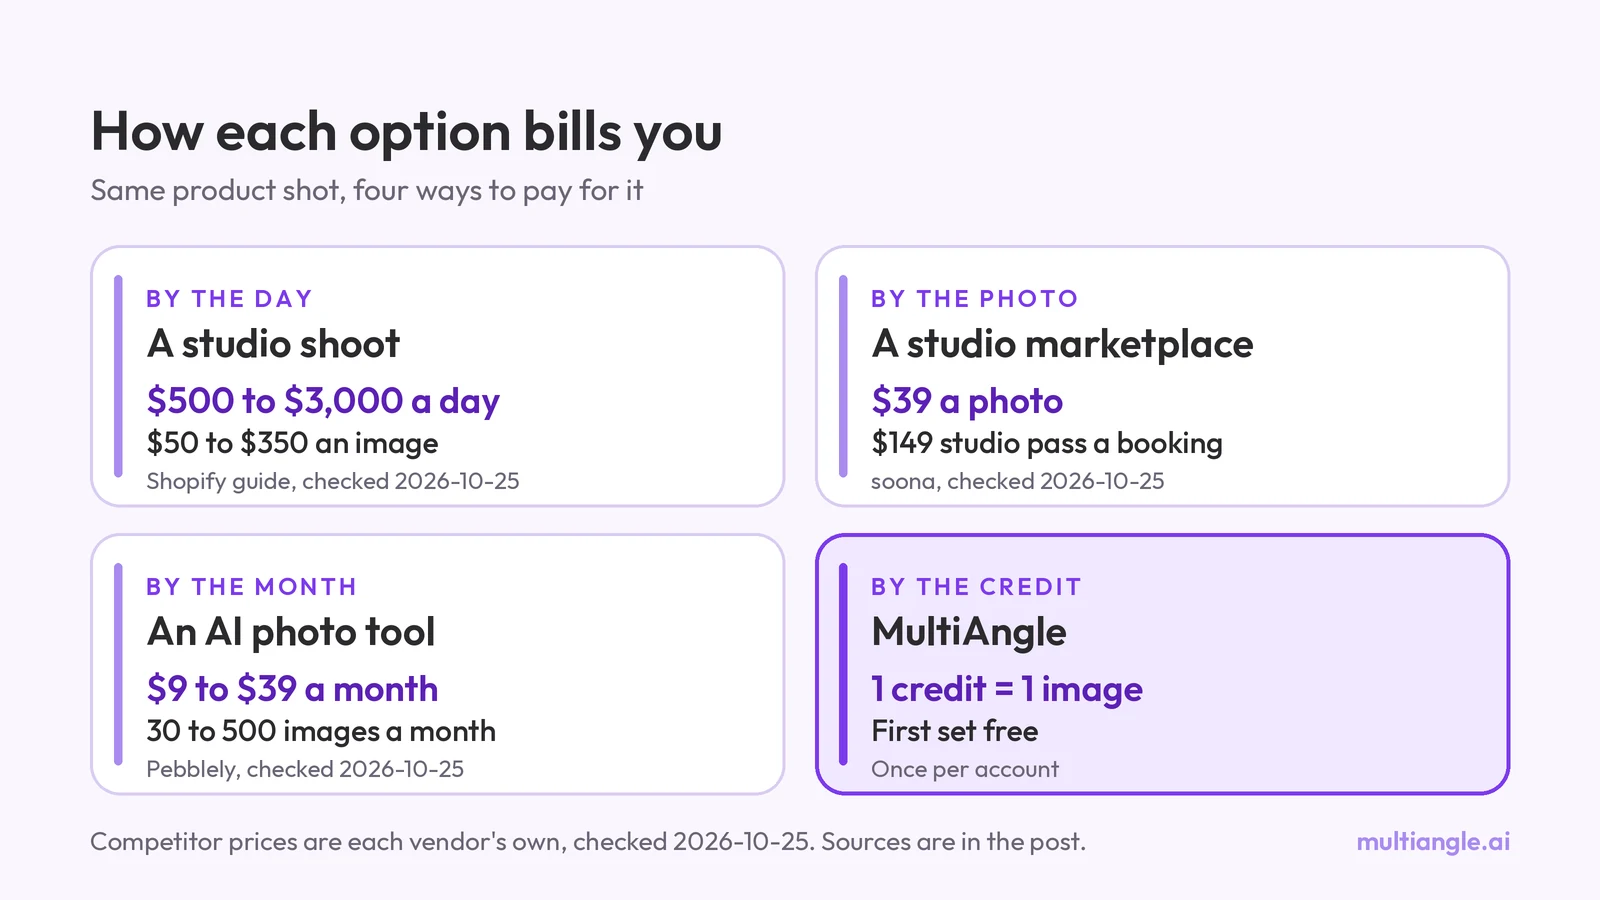
AI product photography cost against a studio shoot, with dated prices: $50–$350 an image at a studio, AI tools from $9 a month, and what credits cost.
AI product photo accuracy, checked the honest way: compare every image with a real photo at 100% on six checks, with passes and fails from our own test.
AI can change a product and still look convincing, so the honest test of AI product photo accuracy is to compare every generated image with a real photo of the product from the same angle, at 100% zoom, on six checks: shape, words and logos, colour, parts and sides, invented detail on unseen sides, and the file. This post gives the checks and a one-page sheet, then shows each one on our own outputs, failures included.
Key takeaways
Often not fully accurate. Photoroom, a vendor of editing tools, tested four general models on 850 fashion products (3,400 generations): the best base model passed a full-fidelity check 29.0% of the time, and logo or text distortion was the most common failure at 20.1%. Their own add-on layer reached 38.2% (Photoroom benchmark, checked 2026-09-26).
That is a vendor's benchmark of fashion try-on, and it sells the fix, so read it as a warning, not a measurement of any one tool. Digital Applied's checklist (published 2026-09-14) covers six areas: shape, colour and material, words and symbols, included items, scale and function, and the final file. Its page makes the key point that "a prompt such as 'keep the product identical' is an instruction, not evidence" (Digital Applied, checked 2026-09-26). It also states that no image generation was performed for it, so it shows no outputs.
Ours covers the same ground, adds a check for sides the photo never showed, and is run on our own outputs below. For the data side, see our test of where AI drifts across 20 products: of 139 generated views, 117 had no failing check, 58 passed every applicable check, and 22 failed at least one. This post is the reusable method.
One limit applies to every example here: the products in our test are Nano Banana images, not real products, so there were no real back or side photos to compare against. That is why the checks below tell you to take those photos for your own product. What we can show is what a pass and a fail look like on the generated side.
Product photos made from one image are the case this is built for: the model has to invent every side the photo didn't show. More on that cluster is under product photo guides.
Check six things on every image: shape, words and logos, colour and material, parts and sides, unseen sides, and the file. Words and logos fail most visibly, so read them first. The table gives what to look for and what a pass and a fail look like.
| Check | What to look for | Pass looks like | Fail looks like |
|---|---|---|---|
| Shape | Outline, height-to-width ratio, curves, how a handle or neck joins the body | The silhouette matches the real product when you overlay the two | A taller neck, a thicker handle, a rounder base |
| Words and logos | Every letter, number and logo stroke, at 100% | Each letter and the logo shape match the real label | Changed, mirrored, missing or extra letters; a redrawn logo |
| Colour and material | Hue, finish and texture under the same light | The same hue and the same matte or gloss | A warmer shade, a matte finish turned glossy |
| Parts and sides | Handles, ports, zips, pockets: how many and on which side | Each part present once, on the correct side | A handle on the wrong side, a missing port, a second pocket |
| Unseen sides | The back and below, which the input never showed | Matches a real photo of that side | A logo, label or detail that isn't on the real product |
| Scale and file | Size against objects in the scene; crop; pixel size | Believable size, nothing cropped, large enough for the listing | A product that reads bigger or smaller than it is; a cut-off edge |
Photograph the real product from the angle you want to check, open the real photo and the generated image side by side at 100%, run the six checks, and mark each image keep, fix or reject. Do this per image, not per set: one good view says nothing about the next.
The same checks apply to an upscaled file: see upscaling a product photo to 4K.
The input image shows one side. A generated back, underside or far side was never in it, so comparing the output to the input only tells you the front held. A real photo from the new angle is the only ground truth for what the product does there.
That matters most for the back, where labels, ingredient text and ports usually sit. We did not have that ground truth: our test products have no real back. So all we could judge was what appeared on the back that the input never showed, and that is already telling. Here are four backs made from front images.
The can's back has half-formed lettering and two small gull marks the input does not have. The book's back shows the front title mirrored. The chip bag's back has a ghosted, garbled brand name split by a seam. The cereal box's back is the front artwork again. Next to a real back photo, each of these becomes a clear pass or fail. Without one, all you can say is that something was invented, and that is not enough to publish.
Read the real label and the generated label one letter at a time at 100%, and compare logo shapes stroke by stroke. Small print drifts first, and text on a hidden side can come out mirrored or reordered. If you can't read a letter in the output that you can read on the real product, that image fails.
This is a failing example, chosen to show the check, and not typical. The cereal box's 3/4 right view spells the wordmark OATILY CRUNUCH: an extra I after the T and an extra U in the second word. Both are easy to miss in a thumbnail and obvious at this scale. In our test the lettering that the input showed came out right far more often than not: of 85 views where we could check it, 79 passed, 5 were partial and 1 failed, this one. The shampoo bottle shows what a pass looks like: LUMEN, DAILY REPAIR SHAMPOO and 250 ml were correct on all six views that show the label. The lettering that failed was mostly lettering the input never showed, which is why the back needs the check most.
Compare colour under the same light, in the same viewer, with a physical reference in the frame. A grey card or a colour swatch in the real photo gives you something to match; judging "close enough" from memory, or across two different screens, will mislead you.
We did not run a grey-card test: our inputs are AI-made images, so there was no real product colour to match. The check we could run is narrower: does a generated view stay close to its input? We took the median colour of a small patch on the plain body of the product, in the input and in every view, and compared lightness (L*, where 0 is black and 100 is white).
The numbers move a lot. The sage planter has a lightness of 51 in the input, and its views run from 23 (left side, a very dark green) to 80 (right side, pale mint), and the green hue stays the same family. The bowl is 75 in the input and 41 in its left side view, a grey-brown bowl, and 91 in its right side view. On the hand-painted mug, the glaze goes from a speckled cream to a cleaner white in two views (lightness 88 against 65, and chroma, the strength of the colour, 6 against 19). We scored the largest swings as colour failures (a colour difference of 25 or more, which counts the strength of the colour as well as its lightness): 5 views in all, namely the planter's left and right sides, the mug's 3/4 right and right side, and the bowl's left side. Colour failed nowhere else in the 139 views.
Two cautions. Part of any swing is the light in each generated image, and a real product also looks different from each side, so a swing is a prompt to look closely, not proof of a wrong colour. And this only compares a view with its input: if the input was shot under warm light, the whole set is warm. Only a real photo with a grey card in frame tells you whether the set matches the product.
New angles need two extra checks: asymmetry and invented detail. Check that the product's own left and right stay correct as the camera moves, and check anything on the back or underside against a real photo, because the model never saw those sides.
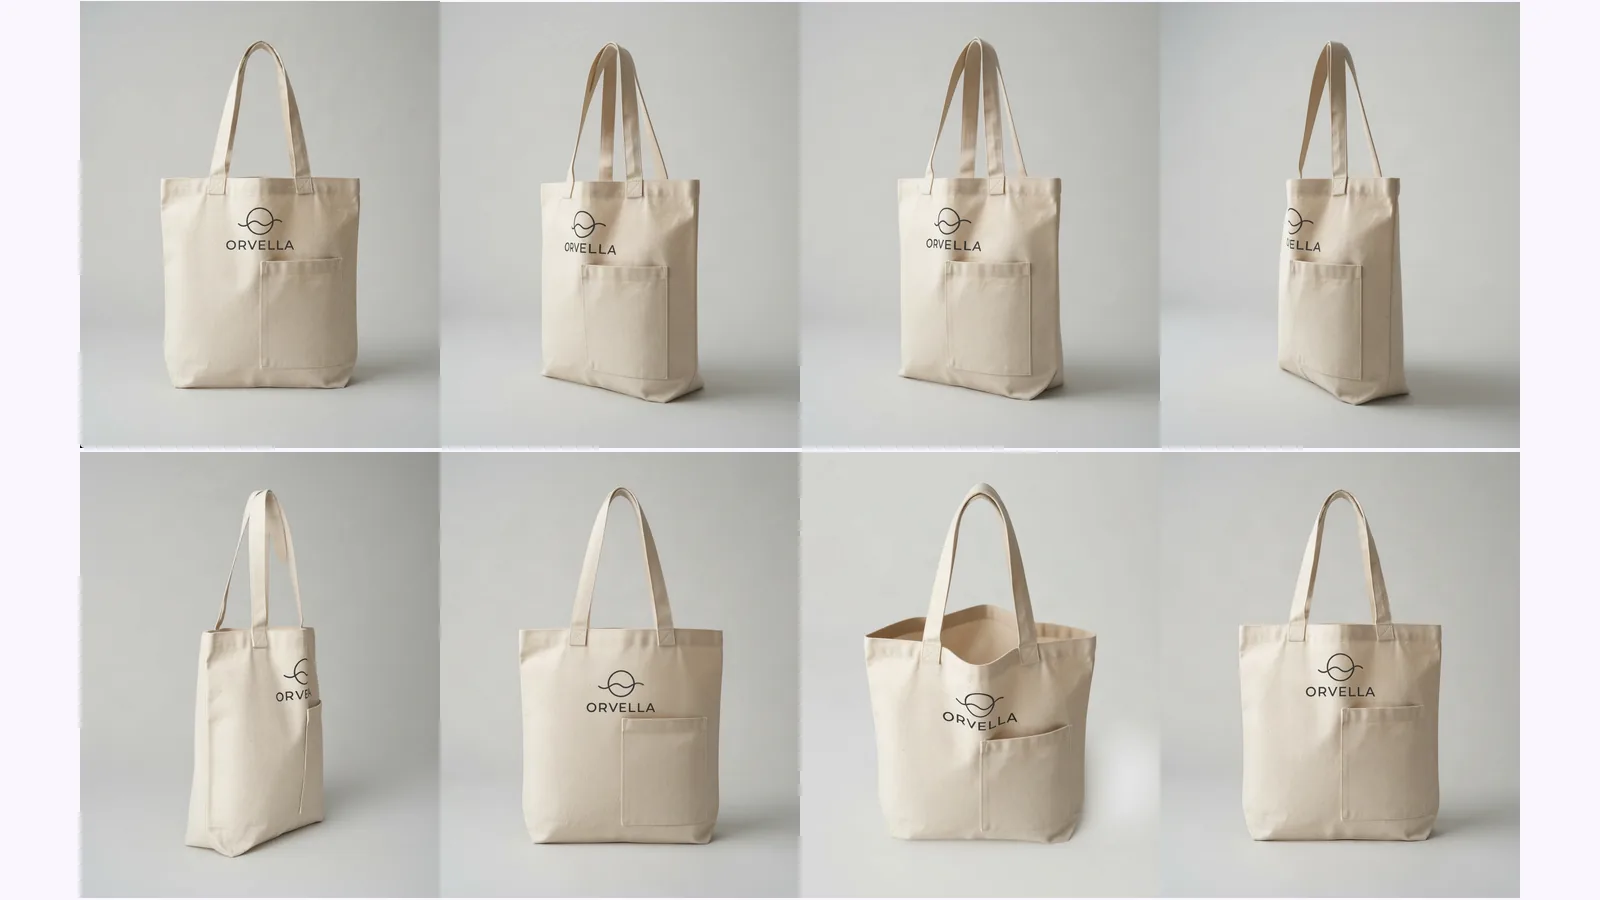
In our earlier tests, the back view of a tote carried the same logo and pocket as the front though the input never showed the back (in our product photography angles guide), and a prompted back view of a sneaker added a large logo on the heel (different angles of the same image with AI). In the 20-product test, 15 of 139 views failed on invented detail, 12 of them with garbled or mirrored lettering. Those are the failures to look for. For which views a product page needs at all, the same guide has a table by product type.
A handle is the easiest asymmetry test. The mug's handle is on the right in the input. It should stay on the right in the 3/4 left and above views, and swap to the left in the back view. It did, in all three. The kettle is the same test with a spout too.
On the kettle the back swapped sides correctly, but the 3/4 left view also shows the spout on the right, pointing at the camera, which only works as a rear three-quarter view and not a front one. We scored it partial, because without a real 3/4 left photo we could not settle it. With one, you can. Across all 139 views, the parts check failed once (the watch's above view has a second date window and a second buckle) and was partial in 6 more.
For contrast, here is what a pass looks like on a simple object.
Six of the bottle's seven views passed every check. The seventh, the below view, is partial: the camera is close to level with the bottle rather than looking up. The label's letters, the pump head and the white all held, and the pump head swaps to the other side on the back view, as it should. This is a simple object and not a sign every product will pass: the same test failed the cereal box on 5 of its 7 views.
Fix by the cause. Regenerate the one angle that failed, edit that single angle with Improve if you are on a paid plan, retake your input photo if the label was unreadable in it, or use your own real photo for that angle. Then run the six checks again on the new image. We did not test how often a re-roll fixes a failure, so we can't say how many tries it takes.
Improve and the prompt field are paid-only: the prompt field, and Improve (edit one angle) on Room angles and Product turnaround. If the failure is on the back or a detail with text, the most reliable fix is a real photo of that side, and generated views for the angles that are only about shape. A full product set costs 7 credits, and the free plan gives 4 credits, on the 1st of each month (UTC). Questions about credits are answered in the FAQ.
The test is only as good as the real photo and the person looking, and it can't catch everything.
Make a set from one clear front photo, photograph the real product from the angles you care about, and run the sheet on each image you plan to publish. The Product turnaround template returns 8 views: front, 3/4 left, 3/4 right, left side, right side, back, above and below. Your upload is one of them, so 7 are generated.
Plan prices and credit costs per set are on the pricing page. For the wider workflow of shooting and publishing, see our guide to AI product photography.
Generate a set and run the test
Marketplaces judge the image, not how it was made: background, fill, category rules, and whether it shows the product you ship. A generated image that doesn't match the product also invites returns. The one AI-specific rule we know on Amazon is the people tag, covered in Amazon lifestyle images.
We found no rule requiring disclosure of an AI product image as such in the sources we read. Amazon staff do require a metadata tag on photorealistic AI-generated people (Seller Forums, checked 2026-09-26). Check each marketplace's current rules, and don't present a generated view as a photograph of something it isn't.
Start with one product and one set, then test each type you sell, such as a reflective one or one with small print, because those fail differently. MultiAngle runs one product at a time, so you'll check each product you publish anyway.
A 3/4 view is a generated view, so it passes only if it passes the six checks against a real photo. Marketplaces may also set the angle for your category, and Amazon's main image has its own white-background rule: see the main image check.
More on this topic: Product photos from every angle and Product Photography Angle Guides.
AI product photography cost against a studio shoot, with dated prices: $50–$350 an image at a studio, AI tools from $9 a month, and what credits cost.
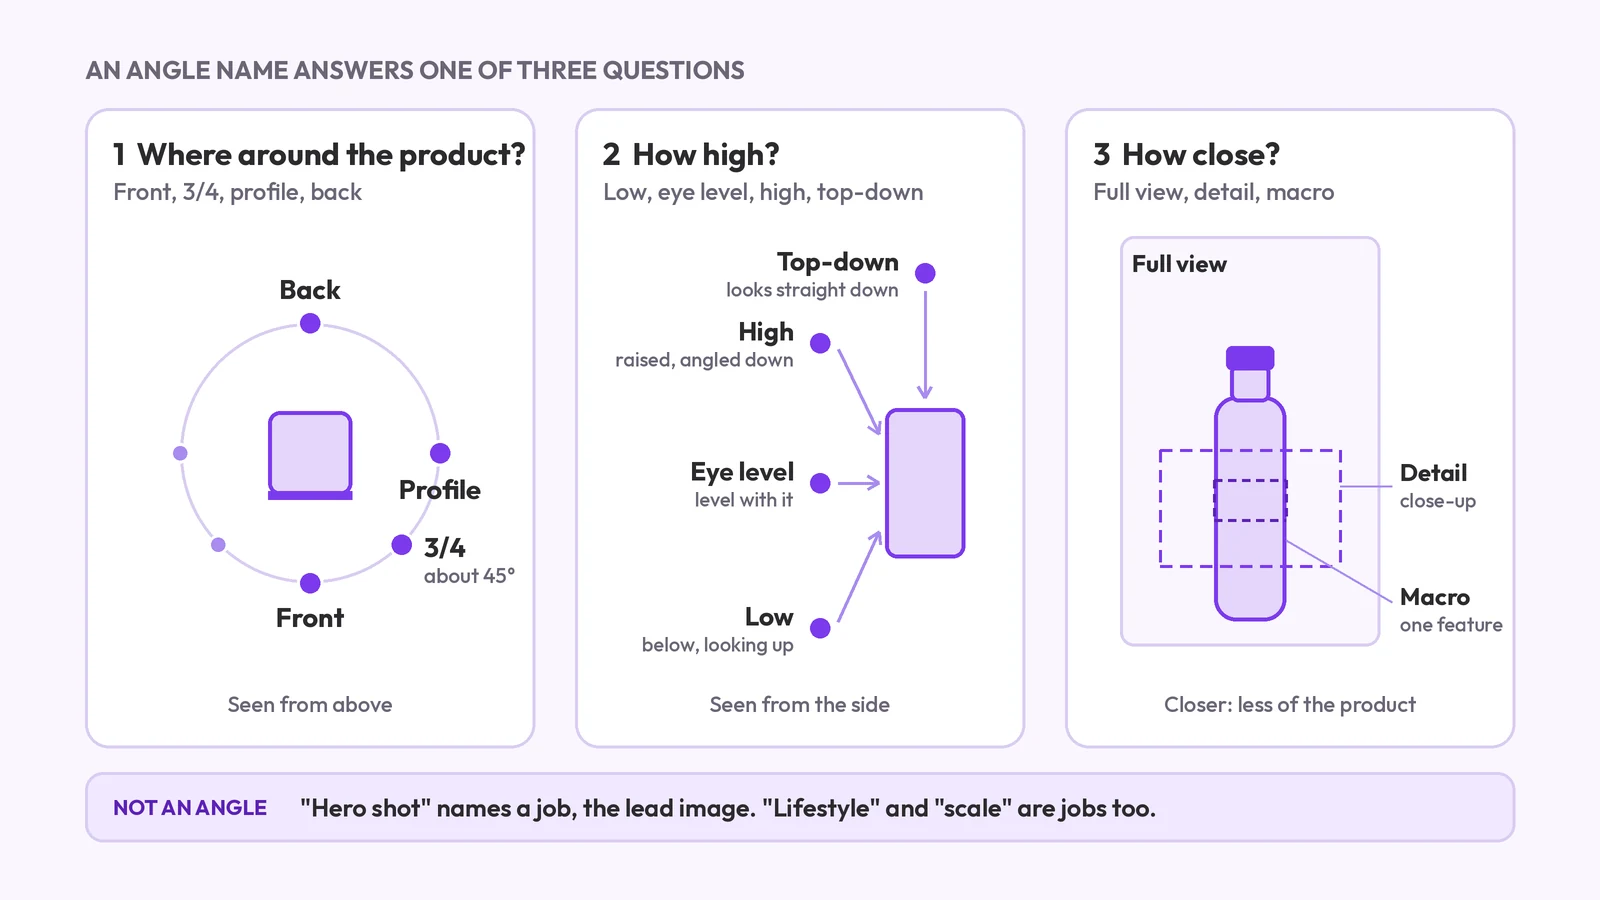
Product photography angle names: front, 3/4, profile, back, high, low, top-down and detail. What each means, which products need which, and what a set covers.
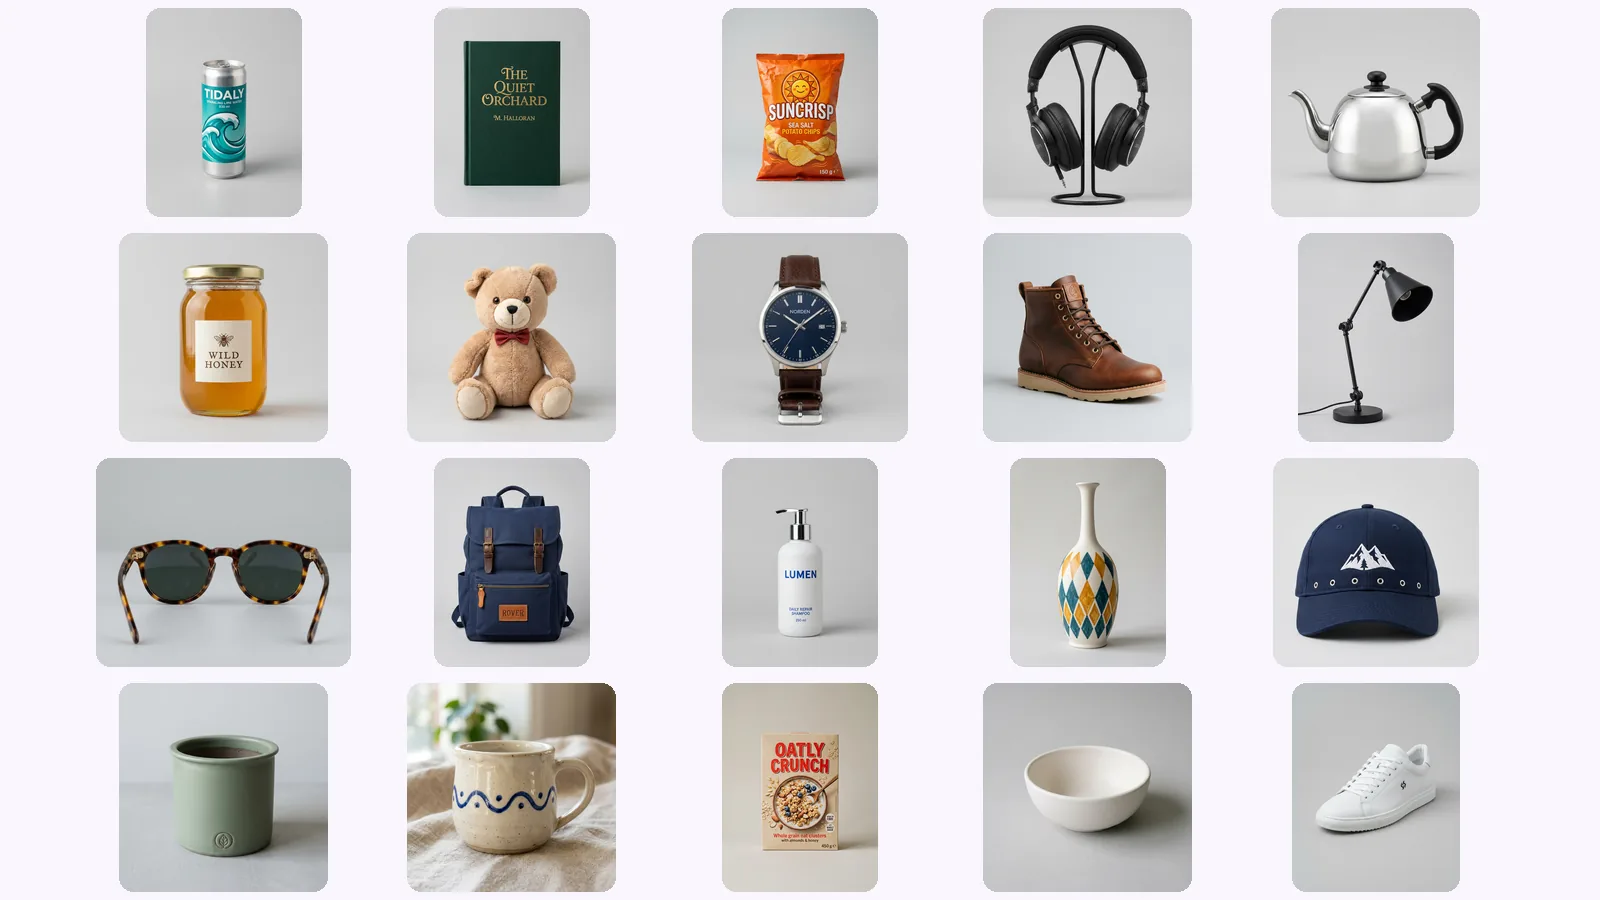
We scored 139 generated views of 20 AI-made products on six checks. Where AI product photos drift: the back view, garbled lettering, a level 'below'.